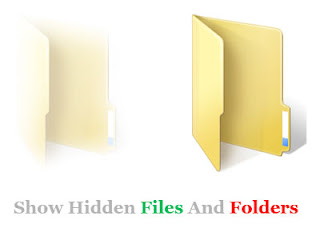
How to Find Hidden Files in Windows
Find Hidden Files Your Windows. To protect users, Windows hides important system files and folders, thereby preventing accidental deletion and modification. It also enhances the readability of file listings by hiding known file extensions (such as .xlsx for Excel files or .docx for Word files) so that it’s less confusing for you to find what you’re looking for. Unfortunately viruses, spyware, and hijackers often hide there files in this way making it hard to find them and then delete them.
Windows offers an easy way to reveal hidden system files or file extensions. By following the steps below for each version of Windows you will be able to change the operating systems behavior so that you can see hidden and protected files. In this way you will be able to delete or replaces files for troubleshooting purposes. Here’s how to do it.
Windows 8 User
Follow these steps to display hidden files and folders.
- From the Windows 8 Start Screen, click on the Control Panel app.
- When the Control Panel opens scroll down to the bottom and click on the More Settings option.
- The traditional Windows 8 Control Panel will now open. When it is open, click on the Appearance and Personalization link.
- Under the Folder Options category, click on Show Hidden Files or Folders.
- Under the Hidden files and folders section select the radio button labeled Show hidden files, folders, or drives.
- Remove the checkmark from the checkbox labeled Hide extensions for known file types.
- Remove the checkmark from the checkbox labeled Hide protected operating system files (Recommended).
- Press the Apply button and then the OK button..
- Now Windows 8 is configured to show all hidden files.
Windows 7 User
Follow these steps to display hidden files and folders.
- Close all programs so that you are at your desktop.
- Click on the Start button --->Click Control Panel menu option.
- When the control panel opens click on the Appearance and Personalization link.
- Under the Folder Options category, click on Show Hidden Files or Folders.
- Under the Hidden files and folders section select the radio button labeled Show hidden files, folders, or drives.
- Remove the checkmark from the checkbox labeled Hide extensions for known file types.
- Remove the checkmark from the checkbox labeled Hide protected operating system files (Recommended).
- Press the Apply button and then the OK button..
- Now Windows 7 is configured to show all hidden files.
Windows Vista User
Follow these steps to display hidden files and folders.
1. Close all programs so that you are at your desktop.
2. Click on the Start button--->Click on the Control Panel menu option.
1. Close all programs so that you are at your desktop.
2. Click on the Start button--->Click on the Control Panel menu option.
3. When the control panel opens you can either be in Classic View or Control Panel Home view:
If you are in the Classic View do the following:
If you are in the Classic View do the following:
- Double-click on the Folder Options icon.
- Click on the View tab.
- Go to step 5.
If you are in the Control Panel Home view do the following:
- Click on the Appearance and Personalization link .
- Click on Show Hidden Files or Folders.
- Go to step 5.
4. Under the Hidden files and folders section select the radio button labeled Show hidden files and folders.
5. Remove the checkmark from the checkbox labeled Hide extensions for known file types.
6. Remove the checkmark from the checkbox labeled Hide protected operating system files.
5. Remove the checkmark from the checkbox labeled Hide extensions for known file types.
6. Remove the checkmark from the checkbox labeled Hide protected operating system files.
7. Press the Apply button and then the OK button.
8. Now Windows Vista is configured to show all hidden files.
8. Now Windows Vista is configured to show all hidden files.
Windows XP User
Follow these steps to display hidden files and folders.
- Close all programs so that you are at your desktop.
- Double-click on the My Computer icon.
- Select the Tools menu and click Folder Options.
- After the new window appears select the View tab.
- Put a checkmark in the checkbox labeled Display the contents of system folders.
- Under the Hidden files and folders section select the radio button labeled Show hidden files and folders.
- Remove the checkmark from the checkbox labeled Hide file extensions for known file types.
- Remove the checkmark from the checkbox labeled Hide protected operating system files.
- Press the Apply button and then the OK button and shutdown My Computer.
- Now your computer is configured to show all hidden files.
Note: You might notice that the icons for hidden files and folders are slightly grayed out. This is an easy way to separate hidden files and folders from your normal unhidden ones.


0 comments:
Post a Comment