How to Disable the Windows 8 Lock Screen


Disable Windows 8 Lock Screen. When you first boot Windows 8, change users or wake from sleep,  you’re presented with a lock screen that you must drag up and away (or click to close) before you reach the login prompt. It’s a waste of time on PCs. Lock screen might look good on smartphones and tablets but its of no use in Desktops and laptops. Also it requires an extra step to unlock the locked PC. If you also one of those Windows 8 users who don't like the lock screen and want to disable it, this tutorial will help you. Fortunately, disabling the Lock screen is simple.

Today in this tutorial, we are going to tell you how to turn off the lock screen in Windows 8? By following this guide, you'll no longer see the lock screen in Windows 8.

METHOD 1: Using Group Policy Editor (gpedit.msc)


1. Hit Window Key + R. A run dialog box appears.
2. Type gpedit.msc into the box and hit Ok. The Local Group Policy Editor appears.
3. Navigate to Computer Configuration -> Administrative Tools -> Control Panel -> Personalization
4. In the right side pane, double-click on Do not display the lock screen to open its settings box.
5. Select Enabled and click on Apply/OK. That’s it


METHOD 2: Using Registry Editor (regedit)


If you don't want to use Group Policy Editor or dosen't work, you can do the same thing using Registry Editor. Just follow these simple steps:

1. Press "WIN+R" key combination to launch RUN dialog box then type regedit and Enter. It'll open   Registry Editor.
2. Navigate to HKEY_LOCAL_MACHINE\SOFTWARE\Policies\Microsoft\Windows\Personalization.
If the above key doesn't exist, you'll need to create it manually. 
3. Select Personalization key and in right-side pane.
4. Create a new DWORD (32-bit) with the name NoLockScreen and set the value to 1
5. Close Registry Editor and log off or restart Windows to take effect. It'll completely turn off lock screen.

If you want to restore lock screen in future, just delete the DWORD or set its value to 0.


Windows 8 Tips :  How to Disable the Windows 8 Lock Screen


The Best Laptop Apple MacBook Pro

Apple MacBook Pro

Apple MacBook Pro MD101LL/A 13.3-Inch Laptop (NEWEST VERSION). If you want to buy the best laptop out there, then the Apple MacBook Pro MD101LL/A 13.3-Inch Laptop is what you need. I highly recommend this Laptop for anyone. This is a great Laptop and has been amazing. Though it might seem expensive, it will a great tool for anything that you need to accomplish online. With programs like photo booth, garageband and many more, you will never run out of things to do while on your new MacBook Pro. This is definitely a must buy in the electronics world. This is certainly one of the most wanted laptops out there today and it is used by people of all ages.

The Apple MacBook Pro is arguably the best product that Apple has released in recent years and people have been talking about how it is so powerful. Whether you are a video editor or someone that’s looking to really create big files, then this just might be the Apple product for you. The nice thing about the Apple products is that you will be getting what you pay for. If you want one of the most powerful laptops out there today, then the Apple MacBook Pro MD101LL/A 13.3-Inch Laptop is an excellent choice.

Details for Apple MacBook Pro MD101LL/A 13.3-Inch Laptop (NEWEST VERSION)
  • Operating System: Mac OS X Lion v10.8
  • Graphics: Intel HD Graphics 4000
  • Audio and Speakers: Apple-designed Dual Stereo
  • Up to 7 hours of battery life
  • 13.3-inch LED-backlit glossy widescreen display with edge-to-edge, uninterrupted glass (1280 x 800-pixel resolution)
  • Built-in HD 720p FaceTime HD camera for video chatting 
  • Thunderbolt port (up to 10 Gbps) with native video output support for Mini DisplayPort plus DVI, VGA, dual-link DVI, and HDMI (requires adapters, sold separately)
Features :
  • 2.5 GHz Dual-Core Intel Core i5 processor
  • 4 GB DDR3 RAM; 500 GB Hard Drive
  • 13.3 inch LED-backlit display, 1280-by-800 resolution
  • Intel HD Graphics 4000
  • Ships in Certified Frustration-Free Packaging

What are People Saying?

The MacBook Pro is very fast and can be one of the smoothest laptops to have. Whether it is editing a video or editing a few pictures on Photoshop, you can expect to see amazing speed.
The 2012 13" Macbook pro is an outstanding Computer. I have numerous laptops including a Lenovo t400 and Dell precision mobile workstation and the Macbook pro beats them handily. Any suggestion that the Macbook pro is a 2 star machine is simply ridiculous and extremely misleading.

Honestly, the display on the 13.3" MacBook Pro is gorgeous. I can see where a photographer might enjoy the Retina Display, but for me, the 1280x800 resolution of the screen on this laptop is perfect. The display is bright, very bright, sharp and has excellent viewing from side to side. I'm a little conflicted with the glossy screen, but I think I have grudgingly accepted it for the most part. In most situations I find it nicer than a glare-free screen. For some situations however, it is not the best because of the reflections on the screen of surrounding lights and such. You must remember that while reducing glare on a screen might make it easier to view in certain situations by reducing reflections of light and surroundings, by its nature the anti-glare will reduce sharpness of the screen image. By having the glossy screen you have an amazingly bright, clear and sharp image that is just beautiful to view. 

How to Erase Internet Browser History


Deleting Internet Browsing History. To conserve hard drive space or to help keep their Internet browsing private, users may find it necessary to delete their Internet History. Let’s assume that If you share a computer with someone else, you might not want that person to be able to check your Internet browsing history. That record is easy to erase, however, in all of the major browsers. Below is how to delete your browser history.

Mozilla Firefox Users

Here goes the step for deleting the browsing history in Firefox:
1. Automatically Delete Firefox Browsing History
  • Click Tools--->Options--->Privacy
  • Under the history option choose “Use Custom settings for history
  • Click on the “Clear history when Firefox closes” option
  • To confirm the action click OK button
Clear Browsing History

You can customize the options for clearing the browsing history by choosing the things that you would like to delete. To do this click the “Setting” button and check all those options that you would like to delete. If all the buttons are checked all the history which includes Cookies, Browsing History, Active Logins, Form and Search History, Download History and lots more would be deleted on exiting Mozilla Firefox.

2. Manual Delete Firefox Browsing History
Press CTRL + Shift + DEL to open the Clear All History window.
Delete Browsing History

Google Chrome Users

Here goes the step for deleting the browsing history in Google Chrome:
Press CTRL + Shift + DEL to open the Clear Browsing Data Window.
or
1. Click the Chrome menu Chrome menu on the browser toolbar.
2. Click Tools--->Clear Browsing Data
3. In the dialog that appears, select the "Clear browsing history" checkbox.
4. Use the menu at the top to select the amount of data you want to delete. Select beginning of time to clear your entire browsing history.
5. Click the Clear browsing data button. This will clear the selected types of Internet history for the chosen time period.

Opera users

Here goes the step for deleting the browsing history in Opera:
Opera users can delete their history by clicking the "File" menu, "Preferences", "History", and click "Empty now" button. In addition, users can check "Empty on exit" if they wish for this task to occur each time they exit the browser.

Internet Explorer users

Here goes the step for deleting the browsing history in Internet Explorer:
Press CTRL + Shift + DEL to open the Clear Browsing History window.
or
1. Click Tools--->Internet Options
2. Check the “Delete browsing history on exit” option which is under the General Tab and under browsing History heading.
3. Click Delete Button
4. Click on “Apply” and then “OK”.

Those were the methods of Clearing the web browsing history in the widely used web browsers. Be safe and stay safe by deleting the browsing history.

How to Find Hidden Files in Windows

Display Hidden file windows

Find Hidden Files Your Windows. To protect users, Windows hides important system files and folders, thereby preventing accidental deletion and modification. It also enhances the readability of file listings by hiding known file extensions (such as .xlsx for Excel files or .docx for Word files) so that it’s less confusing for you to find what you’re looking for. Unfortunately viruses, spyware, and hijackers often hide there files in this way making it hard to find them and then delete them.
Windows offers an easy way to reveal hidden system files or file extensions. By following the steps below for each version of Windows you will be able to change the operating systems behavior so that you can see hidden and protected files. In this way you will be able to delete or replaces files for troubleshooting purposes. Here’s how to do it.

Windows 8 User

Follow these steps to display hidden files and folders.
  • From the Windows 8 Start Screen, click on the Control Panel app.
  • When the Control Panel opens scroll down to the bottom and click on the More Settings option.
  • The traditional Windows 8 Control Panel will now open. When it is open, click on the Appearance and Personalization link.
  • Under the Folder Options category, click on Show Hidden Files or Folders.
  • Under the Hidden files and folders section select the radio button labeled Show hidden files, folders, or drives.
  • Remove the checkmark from the checkbox labeled Hide extensions for known file types.
  • Remove the checkmark from the checkbox labeled Hide protected operating system files (Recommended).
  • Press the Apply button and then the OK button..
  • Now Windows 8 is configured to show all hidden files.

Windows 7 User

Follow these steps to display hidden files and folders.
  • Close all programs so that you are at your desktop.
  • Click on the Start button --->Click Control Panel menu option.
  • When the control panel opens click on the Appearance and Personalization link.
  • Under the Folder Options category, click on Show Hidden Files or Folders.
  • Under the Hidden files and folders section select the radio button labeled Show hidden files, folders, or drives.
  • Remove the checkmark from the checkbox labeled Hide extensions for known file types.
  • Remove the checkmark from the checkbox labeled Hide protected operating system files (Recommended).
  • Press the Apply button and then the OK button..
  • Now Windows 7 is configured to show all hidden files.

Windows Vista User

Follow these steps to display hidden files and folders.
1. Close all programs so that you are at your desktop.
2. Click on the Start button--->Click on the Control Panel menu option.
3. When the control panel opens you can either be in Classic View or Control Panel Home view:

    If you are in the Classic View do the following:
  • Double-click on the Folder Options icon.
  • Click on the View tab.
  • Go to step 5.
    If you are in the Control Panel Home view do the following:
  • Click on the Appearance and Personalization link .
  • Click on Show Hidden Files or Folders.
  • Go to step 5.
4. Under the Hidden files and folders section select the radio button labeled Show hidden files and folders.
5.  Remove the checkmark from the checkbox labeled Hide extensions for known file types.
6. Remove the checkmark from the checkbox labeled Hide protected operating system files.
7. Press the Apply button and then the OK button.
8. Now Windows Vista is configured to show all hidden files.

Windows XP User

Follow these steps to display hidden files and folders.
  • Close all programs so that you are at your desktop.
  • Double-click on the My Computer icon.
  • Select the Tools menu and click Folder Options.
  • After the new window appears select the View tab.
  • Put a checkmark in the checkbox labeled Display the contents of system folders.
  • Under the Hidden files and folders section select the radio button labeled Show hidden files and folders.
  • Remove the checkmark from the checkbox labeled Hide file extensions for known file types.
  • Remove the checkmark from the checkbox labeled Hide protected operating system files.
  • Press the Apply button and then the OK button and shutdown My Computer.
  • Now your computer is configured to show all hidden files.
Note: You might notice that the icons for hidden files and folders are slightly grayed out. This is an easy way to separate hidden files and folders from your normal unhidden ones.

Computer Troubleshooting  "How to Find Hidden Files in Windows"


Fantastic Intel Processor Core i7-3770K Quad Core

Intel Processor

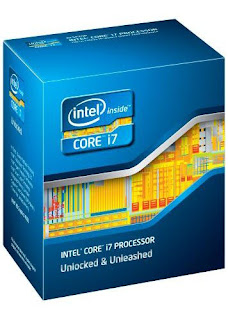
Intel Core i7-3770K Quad-Core Processor 3.5 GHz 8 MB Cache LGA 1155 - BX80637I73770K.
If you are looking for fantastic Intel Processor, Intel Core i7-3770K Quad-Core Processor 3.5 GHz 8 MB Cache LGA 1155 - BX80637I73770K recommended. I highly recommend this processor for anyone. This is a great top of the line processor and has been amazing. The only people who should not get this is people who have unlimited money and that love to overclock a machine to the fullest extent just to show how high it could go. Unless you're that person you should get this processor.

The Intel Core i7 processor powers through all tasks including gaming, photo editing, advanced office tasks and content creation. With multiple cores the Intel Core i7 processors are multi-tasking monsters able to tackle any task. The advanced power saving technologies in the Intel Core series of processors helps keep running costs low.

What are people Saying?

The i7-3770k is a fantastic processor! Out of the box (with no overclocking), I got a Windows Experience Index rating of 7.7 (on a 1.0 to 7.9 scale). The CPU installation is quite easy and the 'k' at the end of 3770k means the processor is unlocked for easier overclocking. The HD 4000 graphics are also great! I got a Windows Experience Index of 6.5 in both graphics categories without the need for a discrete GPU (if you don't need serious graphics performance, this processor could save you money on a graphics card!).

This processor that I bought came in a very good packaging. I really didn't need this much power but I wanted my computer to be fast. I just installed this 2 days ago With no trouble at all I overclock it at 4.67 Very stable And running cool. The price was reasonable and received it in less than 3 days. I would recommend this processor to anyone.

If you want to purchase Intel Core i7-3770K Quad-Core Processor 3.5 GHz 8 MB Cache LGA 1155 - BX80637I73770K. You should not miss this opportunity after you search a lot for where to buy. Read more Customer Review here "Intel Core i7-3770K Quad-Core Processor 3.5 GHz 8 MB Cache LGA 1155 - BX80637I73770K"

Free Scan and cleans windows registry using CCleaner

scan and clean windows registry easy using CCleaner


How to use CCleaner to scan and clean Windows Registry? There are many programs that you can use to clean your registry erros. Some of these cost money, while others are free. CCleaner is one of the free ones. CCleaner is registry cleaner program I use all the time because it has a simple interface and really comes with every tool you need to Speed Up Your Computer and optimize your systems performance. It's easy to use, prompts you backup the registry before it makes changes, and includes a number of other useful tools. CCleaner is a malware-removal tool that cleans web browser temporary folders and files, cleans the Windows registry of unwanted or unused registry keys, and provides an easy way of preventing unwanted programs from running at startup. 

The CCleaner registry cleaner working with all versions of Windows. CCleaner is easy for beginners to use, just launch it and click the Run Cleaner button. But there’s a lot more you can do with it. Alright enough talk, here's the procedure below will guide you through running CCleaner on your computer. Just follow these simple instructions.

1. Download And Install CCleaner

To download and install CCleaner, do the following:

  • Download CCleaner and install it.
  • During the installation, you will be given several install options. We recommend removing the check mark next to Add 'Run CCleaner' option to Recycle Bin context menu and Add 'Open CCleaner...' option to Recycle Bin context menu.
  • You may be prompted to download/install the Google Chrome browser and set it as your default browser.  You can choose to allow this or not.
  • Complete the installation.

When CCleaner finishes installing, you will have the option to open the program and view the notes.  Leave check marks in whatever boxes you want and choose finish. The first time you open CCleaner, you may receive a prompt asking if you want to allow CCleaner to keep cookies from trusted sites such as Google, Yahoo, etc.  You can select Yes (Recommended) or No.

2. Open CCleaner

Launch CCleaner. Double click the CCleaner icon on your desktop, or run CCleaner from your Start menu's Programs folder.


3. Modify Advanced Settings

Before you begin scanning your computer with CCleaner, you should make the following change:

  • Click Options-->Click Advanced. Remove the check mark next to Only delete files in Windows Temp folders older than 24 hours.
  • Click Options-->Click Cookies. You can select the cookies you want to keep on your browser before scanning your computer.

4. Scan Temporary Files

To scan your computer's temporary folders for unwanted files, do the following:
  • Click Cleaner on the left side of the CCleaner window.
  • Click the Run Cleaner button.
  • Click OK when you are asked, This process will permanently delete files from your system. Are you sure you wish to proceed?
  • After the scan completes, the progress bar will say 100% and a summary is displayed, including a list of files that were removed and the amount in MegaBytes (MB) that were deleted.

5. Scan the Registry

To scan your computer's registry for unwanted items, do the following:
  • Click Registry on the left side of the CCleaner window.
  • Click the Scan for Issues button.
  • When the scan completes, click the Fix selected issues… button.
  • Click Yes when you are asked, Do you want to backup changes to the registry?
  • Browse to the folder where you would like to store the registry backup. Then click Save.
  • CCleaner displays each issue to be fixed.
- If you want to fix all issues identified by CCleaner, click the Fix All Selected Issues button.
- If you want to see what changes will be made by CCleaner, you can fix each issue one by one. Click the >> button to review each issue. Click the Fix Issue button to take the action shown next to Solution: in the window.

6. Manage Startup Programs to Prevent Unwanted Programs

  • Click Tools--->Startup button
  • Look through the list of startup programs for anything that looks like malware. Click Disable on those items to prevent them from running at startup.
  • Selecting Disable does not always prevent a program from starting when Windows starts. If you find that a program is still running at startup after using CCleaner to disable it, run CCleaner again and delete the startup item.
  • Do not disable or delete the entries for software that you want to run when Windows starts. For example, you may not want to delete the startup items for Sidebar (Windows 7/Vista), AIM, Yahoo Instant Messenger, etc.
  • It's important to understand that by choosing Delete, you are only deleting the startup item, not the application. For example, if you select and delete Yahoo Instant Messenger, you are not actually deleting the Yahoo Instant Messenger application. You are only deleting the startup item that makes Yahoo Instant Messenger run when Windows starts.
Note : To avoid losing an autostart entry that may be important, use the Disable option instead of the Delete option. You can easily re-enable a disabled autostart entry later.

7. Manage Uninstalling programs

CCleaner’s tools include the Uninstall panel, which lists your installed programs. This panel includes a few more features than the default Windows one – you can rename or delete the entries here and any changes you make will also appear in the Windows Control Panel. You can also save the list of installed programs to a text file – an easy way to keep a list of your installed programs in case you need to remember and reinstall them from scratch.

8. Removing System Restore points

You can use CCleaner to remove System Restore points (see below for details). Once you remove one, nobody will be able to restore the system to that point.
To remove System Restore points:
  • Click Tools--->Click System Restore.
  • Select the System Restore point in the list that you want to remove. Or, use CTRL+Click to select multiple System Restore points.
  • Click Remove. You are prompted to confirm the deletion. Click OK.

9. Manage Drive Wiper to Wiping free disk space

When you delete a file, Windows removes the reference to that file, but doesn't delete the actual data that made up the file on your hard drive. Over time, this data will be overwritten as Windows writes new files to that area of the drive. This means that, given the right software, someone could reconstruct all, or parts of files that you've deleted. For privacy and security reasons, you can set CCleaner to wipe the free areas of your hard disk so that deleted files can never be recovered.
  • Click Tools-->Drive Wiper
  • Choose the type of wipe you require:  
         - Free Space Only will leave your normal files intact
         - Entire Drive will erase all of the files on the drive. 
  • Choose the type of security you require (Simple Overwrite is ok for most situations)
  • CCleaner will warn you before proceeding


Computer Tips :  Free Scan and Cleans Windows Registry Using CCleaner


How to use System Restore in Windows 7

use System Restore


USING SYSTEM RESTORE. The easiest thing you can do to start removing a Virus, Fix the windows Blue Screen or other serious problem, is to do a system restore. This will show you how to do a System Restore to restore your Windows 7 system files to an earlier point in time. It's a way to undo system changes to your computer without affecting your personal user files, such as e‑mail, documents, or photos but any software, hardware, or updates that you have installed after the date of the restore point you pick, will be removed. When a restore point is created, a current copy of these and other important files in Windows 7 are saved and can be restored using System Restore.

Follow these steps for reverting important Windows 7 system files back to a previous state using System Restore:

For more protection, Before you start System Restore, Backup all your files on your PC. Which is designed to help safeguard email, pictures, documents, and other personal files.

1. Click Start--->All Programs--->Accessories--->System Tools--->System Restore.
2. Click on the System Restore program icon
3. Choose the restore point that you want to use.
4. Click Next >
5. Click Finish on the Confirm your restore point window to begin the System Restore.

Note: Windows 7 will shut down to complete the System Restore so be sure to save any work you might have open in other programs before continuing.

Important: System Restore will not revert any of your non-system files like documents, email, music, etc. to a previous state. These types files are completely unaffected by System Restore. If your intention with this tool was to recover a deleted non-system file, try using a file recovery program instead of System Restore.

6. Click Yes to the Once started, System Restore cannot be interrupted. Do you want to continue? dialog box.

7. System Restore will now restore Windows 7 to the state that was recorded in the restore point you chose in Step 4.

Note: The System Restore process could take several minutes as you see the "Please wait while your Windows files and settings are being restored" message. Your computer will then reboot as normal when complete.

8. Immediately after logging in to Windows 7 after the reboot, you should see a message that System Restore completed successfully.

9. Click Close.

10.  Check to see if whatever Windows 7 problem you were troubleshooting has been corrected by this System Restore.

If the problem still persists, you can repeat the steps above and choose another restore point if one is available.

If this restoration caused a problem, you can always undoing this particular System Restore. 

Here's how to undoing System Restore:


1. Click Start--->All Programs--->Accessories--->System Tools--->System Restore.
2. select Undo System Restore , and then click Next .
3. Confirm you have selected the right date and time, and then click Finish .
4. Click Yes in the confirmation message that displays.
5. The computer should shut down and turn back on automatically after the undo restore operation completes. The success message appears.
6. Click Close . The restore operation has been undone.

Computer Tips : How to use System Restore in Windows 7