Update and Upgrade to Windows 8

Upgrade Windows 8
WINDOWS 8 PRO


What is Windows 8? Windows 8 is a completely redesigned operating system developed from the ground up with touchscreen use in mind as well as near-instant-on capabilities that enable a Windows 8 PC to load and start up in a matter of seconds rather than in minutes.

You're probably familiar with Windows XP, Windows Vista and Windows 7 since you use at least one or more of them on a daily basis. Although improvements have been made over the years, they're fundamentally the same as Windows 95. It doesn't take too much effort to switch between any of these versions, even though options have moved around a little.

With Windows 8, things change radically. The desktop, as you know it, is relegated to the side-lines to make way for the new so-called Modern UI (User Interface). This interface is designed to be used with touchscreens as well as with a mouse and keyboard, and requires programs to be written specially for it.

Windows 8 has also made changes to make your PC more secure by boosting its existing security features and adding "SmartScreen," which acts to prevent suspicious programs or apps from being installed or running on your machine. Finally, Windows 8 also gives you the ability to "refresh" itself to give users a new starting point and a cleaner version of Windows.

Windows 8 available for PC, Laptop, tablets. You don't need to buy a new laptop, PC or even tablets to get Windows 8. You can upgrade to Windows 8 from Windows 7, Windows Vista, Windows XP, Windows 8 Release Preview, Windows 8 Consumer Preview, or Windows Developer Preview, but you might not be able to keep all of your files, software programs, and settings. The following table shows what you can keep during an upgrade, depending on the current version of Windows you are running. If you choose to boot from removable media, you won’t be able to keep your software programs, Windows settings, or personal files when you upgrade. So before you do anything at all, be sure to back up to a separate storage device any files, photos, music and video that you want to keep.

To many people, Windows 8 isn't exactly the greatest thing. A fair number of commenters online have expressed little or no interest in upgrading, especially when Windows 7 works perfectly fine. But those of you who want to grab a taste of Windows 8 will need to act today before the price shots up tomorrow. You can buy from Amazon for the best price, save up to 67%. Read More Here.

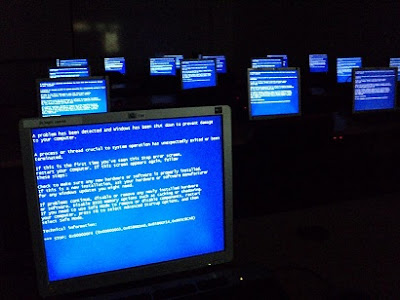
How To Fix The Windows Blue Screen Errors


How To Fix The Windows Blue Screen Errors? The ‘Blue screen error referred to as the ‘blue screen of death error’ (BSoD), is one of the most common errors that affect Windows Computers.If you’ve ever experienced the blue screen error, it usually means that there’s something somewhat seriously wrong with your system. It can even block users from logging onto their Windows operating system. You need to fix the problem so that your Computer remains functional.

There are several ways that may well fix the blue screen error. We can uninstall the drivers and try to install the latest drivers from the website of the hardware vendor. Secondly, it is worth trying to uninstall the device using the Device Manager utility.  This utility can be launched by typing “devmgmt.msc” in the command line. Once the utility window shows up, simply right click on the troublesome device and choose Uninstall.

One thing that is important to keep in mind that Windows tends to leave junks behind after some things are uninstalled. Therefore, it may be necessary to launch the Registry Cleaners to clean up the rest of the troublesome drivers. This is when you need to invest in a good quality registry cleaner program. These programs are designed in such a way that they will automatically scan through the entire registry and fix any damaged entries on the registry that are causing the problems. This they do by even deleting entries that are no longer in use. A good registry cleaner will make your Windows system run a lot faster and become more reliable because the last thing you would want is to lose important information and data from your PC due to the screen of death.

Lastly, there is System Restore. However, this method won’t be useful unless this feature is kept active all the time. Some advanced PC users may disable it to save spaces and processing time of applications. System Restore can be accessed by clicking the Start button and then choosing Programs followed by Accessories and System Tools. Users simply need to choose a date before they install the new conflicting hardware or software and Windows will revert everything to that date. As a result, the operating system should now be working normally again.


However if you're unable to get into Windows to perform the steps below, boot the computer into Safe Mode. Well, the Safe Mode provided with each version of Windows is normally the answer to this. When the computer is trying to boot after passing the self diagnosis process, constantly hitting the F8 key will usually display a list of advanced Windows options, one of which is the Safe Mode. Choosing it will enable users to log onto the system yet with limited capabilities. However, it is enough to fix the BSOD.

NOTE : Before fixing a Microsoft Windows blue screen you must first identify what error it is. Since there are different blue screen errors.


Computer Troubleshooting : How To Fix The Windows Blue Screen Errors

Best External Hard Drive 4TB USB 3.0 Seagate Backup Plus

Seagate Backup Plus 4 TB USB 3.0 Desktop External Hard Drive


Best External Hard Drive 4TB USB 3.0 Seagate Backup Plus. If you want a good-looking and compact external hard drive to back up your computer or extend its storage space, the 4TB USB 3.0 Backup Plus Desktop Drive from Seagate makes an excellent buy.

The 4TB USB 3.0 Backup Plus Desktop Drive from Seagate makes backing up and storing you data quick and easy. With Backup Plus you can easily manage all of your data with an intuitive dashboard. This dashboard allows you to choose from a variety of backup options, share your media throughout social networks, and save all of your online photos.

With 4TB of storage space you can save anything from photos, to videos, movies, and just about anything else you have on your PC or Mac. Transferring your data to and from the drive is quick and efficient as this drive takes advantage of USB 3.0 connectivity allowing for data speeds of up to 5Gb/s.

Backup Plus from Seagate is the simple, one-click way to protect and share your entire digital life—without getting in the way of the rest of your life.

BENEFITS:

  • Easy, flexible, built-in backup options
  • Automatically save photos from your social networks
  • Share photos and video to social networks with a click
  • Up to 4TB capacity for a lifetime of memories
  • Increase transfer speeds by upgrading to Thunderbolt™ technology or FireWire 800
  • Works with PCs and Macs, install the pre-loaded NTFS driver for Mac and use the drive interchangeably between PC and Mac computers without reformatting
  • Easily upgrade to Thunderbolt™ technology or FireWire® 800 with add-on adapters (sold separately). USB 3.0 is also backward compatible with USB 2.0.
  • Share Your favorite moments instantly.

Where to buy Seagate Backup Plus 4 TB USB 3.0 Desktop External Hard Drive

If you still confuse to decide in what place you should buy Seagate Backup Plus 4 TB USB 3.0 Desktop External Hard Drive, I will share it. The best place to buy Seagate Backup Plus 4 TB USB 3.0 Desktop External Hard Drive is at Amazon, the reason is because Amazon (and pretty much any other site's) lowest price available for an online deal for this drive. BUY now to get the best price (price off), get discount 25% to save your money $60 and avoid disappointment if Seagate Backup Plus 4 TB USB 3.0 Desktop External Hard Drive out of stock. Amazon also offers ships for FREE with super saver shipping for US. Please read 'help page of FREE super saver shipping'. BUY NOW Here.

How To Disable The Login Screen At Startup Windows 7 and Vista

How To Disable The Login Screen At Startup Windows 7 and Vista


How To Disable The Login Screen At Startup Windows 7 and Vista? If you have a desktop at home or not in a high-traffic area, you can disable/remove the login screen with password at startup. While starting your Windows Vista or Windows 7 based PC, by default the system asks you to type in your secret password to log in. But after that, you’re not really given a choice to remove the password if you don’t want it. You’re just sort of stuck typing it in every time and that can get old rather quickly. However, If you wish to avoid the Windows Vista and 7 log on process and get your password removed, perform the following computer tips:


  • Go to Start, Control Panel.
  • Click on the User Accounts and Family Safety link.
  • Next, click on the User Accounts link.
  • Under the “Make changes to your user account” section, click on the Remove Your Password link for your account.
  •  On the next screen that comes up, enter in your current password.
  • Click on the Remove Password button to confirm everything.
  • Close out of all the open windows and restart your computer. That will allow you to test the system to make sure your password really was removed.
This process will allow you to start up your computer without any delays of entering your password. From now on, when you start up your Vista and windows 7 computer, you will be taken to your desktop automatically and you will no longer have to worry about a password.

If you’re not the only one who uses your computer, consider leaving it this way. It is a good security feature and it helps to keep all of the different accounts, files and preferences separate from each other. But if you’re the only one who ever uses your computer, you should be able to get rid of the password prompt if you want.

Computer Tips : How To Disable The Login Screen At Startup Windows 7 and Vista

Best Monitor: Dell UltraSharp U3011 30-inch Monitor Reviews

Dell UltraSharp U3011 30-inch Monitor


The Dell UltraSharp U3011 monitor has incredible performance, tons of connection options, and enough OSD features to satisfy most professional artists. The Dell UltraSharp U3011 is an impressive monitor and the most feature-rich 30-incher out there. Not only does it deliver great performance which is expected from most devices running at a 2,560x1,600 resolution but it also has tons of connection options and an OSD with a surprisingly high number of calibration features. The only problem is this monitor has a higher price.

SPECS Dell UltraSharp U3011 30-inch Monitor

  • IPS (in-plane switching) technology for minimal color deviation across a wide viewing angle
  • 30" (76cm) display with 2560x1600 resolution and 16:10 aspect ratio for clear images and exceptional multitasking
  • Easy, versatile adjustability and some of the latest connectivity options, including HDMI, DisplayPort, DVI-D, USB ports and a 7-in-1 media card reader
  • Product has 3 year warranty
  • Refresh Rate: 60Hz (Recommended)


This monitor is a much better choice if you were considering an Apple 27 inch display - Apple has a much, much inferior color gamut, reflective screen which can be an issue in bright rooms, similar price and lack of other connection options make the Apple somewhat limited. The Dell really was plug and play for you. You can read more original review here.

How To Protect Your Computer From Viruses

Protect Your Computer From Viruses

Do you know how to protect your computer from Viruses? Computer viruses are deadly. The dreaded computer virus is a common problem that many PC users face on a daily basis.  Once they’re in your computer, they can be hard to be removed depending on the severity.  Most PC users don’t understand why their computer is always coming down with viruses, but the most common reason why they occur is primarily due to the individual using the computer.  Most people don’t really even know what a computer virus is.  To sum it up, a computer virus comes from malicious programs, internet websites, music, and email to name a few.  Pretty much, these viruses contains trojans, worms, malicious code, etc. that migrate into your machine based on the way you use your computer.

There are many things you can do to keep your computer from catching viruses in the first place.

Defining Viruses:

A virus is a small computer program that can copy and spread itself from one computer to another, with or without the help of the user.  However, viruses typically do more than just be fruitful and multiply, which is bad enough in itself because it hogs system resources.  Anything else viruses are programmed to do, from displaying annoying messages to destroying files, is called their payload.  Often, they cannot deliver their payload until an unsuspecting user does something to make the virus execute its programmed function.  This could be as simple as clicking on an innocent looking file attachment with the .exe (executable) extension.

Catching a Virus:

Most viruses are spread through e-mail attachments because it’s the easiest way to do it.  Although Macintosh, Unix, and Linux systems can catch viruses, hackers are particularly keen on exploiting the security weaknesses in anything Microsoft, particularly Microsoft Outlook and Outlook Express.  Because of the popularity of this software, hackers get maximum bang for their buck, and they probably get some satisfaction from continually reminding Microsoft that being big doesn’t mean you’re perfect.

Solution 1:  Anti-virus Software

Your first line of defense is to install anti-virus software.  To be extra safe, also install firewall software, which is now included in some anti-virus packages.  This software can scan all of your drives for viruses and neutralize them.  Here are some features to consider when evaluating anti-virus software.
  • Compatibility with your operating system – Make sure the software works with your system, particularly if you are using an older operating system like Windows 98.
  • Firewall software – If it’s not included, find out if it’s available.  If you must, buy it from another vendor.
  • Automatic background protection – This means your software will constantly scan behind the scenes for infections and neutralize them as they appear.  This provides some peace of mind.
  • Automatic, frequent updates – Because new viruses appear every day, you’ll want regular updates.  It’s even better if they occur automatically when you connect to the internet.  If automatic updating isn’t included, you’ll have to check the vendor’s website and download updates yourself.  This is vitally important, because you will not be protected from new viruses if your software is out of date.
  • Disaster recovery – Software with a recovery utility to help you get your system back to normal after a virus attack is always good to have.
  • ICSA certification – The International Computer Security Associatioin has standards for the detection rates of anti-virus software.  Make sure your software has the ICSA certification.
  • Technical support – It’s a good idea to select a package that offers free technical support, either online or through a toll-free number.  If you’re ever felled by a virus, you may need it.  Some anti-virus software vendors are Symantec Corporation (Norton AntiVirus), McAfee Corporation (McAfee VirusScan), Trend Micro Inc. (PC-cillin), and Zone Labs Inc. (Zone Alarm Suite).

Solution 2: The Virus Scan

If you receive a particularly juicy attachment that you’re dying to open, save it on your Windows desktop and run your anti-virus software on it first.  To do this, click once gently on the file on your desktop … don’t actually open it … then right click and choose Scan with (Name of Anti-Virus Software) to activate a virus scan.

If it’s infected, your anti-virus software may neutralize it, or at least tell you the attachment is too dangerous to open.  On the other hand, don’t feel guilty if the very thought of saving a potentially damaging file anywhere on your system is enough to quell your eagerness to open it and make you delete it immediately.

Solution 3: Delete first, ask questions later.

When in doubt about the origin of an e-mail, the best thing to do is delete it without previewing or opening it.  However, some viruses, such as Klez, propagate by fishing in people’s address books and sending themselves from any contact they find to another random contact.  You can spread a virus just by having people in your address book, even if you don’t actually e-mail them anything.  They’ll receive it from someone else in your address book, which really makes life confusing.  Because of the proliferation of porn on the internet, e-mail viruses often tempt victims by using sexual filenames, such as nudes.exe.  Don’t fall for it.

Solution 4: Beware of virus hoaxes

E-mails warning you about viruses are almost always hoaxes.  You may be tempted to believe them because you typically receive them from well-meaning friends, who received them from friends, etc.  These e-mails themselves usually aren’t viruses, but some have actually fallen into the hands of hackers who loaded them with viruses and forwarded them merrily on their way as a sick joke.

The proliferation of e-mails about virus hoaxes can become nearly as bad as a real virus.  Think about it, if you obey an e-mail that tells you to forward it to everyone in your address book, and they THEY do it, and this goes on long enough, you could bring the internet to its knees.  If you ever want to verify a virus warning, your anti-virus vendor may have a list of hoaxes on it website.  It’s in the business of providing the fixes, so it will know which viruses are real.

Solution 5: Beware of filename extensions

The extension of a filename is the three characters that come after the dot.  Windows now defaults to hiding filename extensions, but it isn’t a good idea.  Just being able to see a suspicious extension and deleting the file before opening it can save you from a virus infection.

To see filename extensions in all your directory listings, on the Windows XP desktop, click Start button | Control Panels | Folder Options | View Tab.  Clear the check box for Hide extensions of known file types.  Click Apply | OK.  System files will still be hidden, but you’ll be able to see extensions for all the files you need to be concerned with.  Viruses often live on files with these extensions – .vbs, .shs, .pif, .Ink – and they are almost never legitimately used for attachments.

Solution 6: Disable the .shs extension

One dangerous extension you can easily disable is .shs.  Windows won’t recognize it and will alert you before attempting to open an .shs file.  The extension is usually just used for “scrap object” files created in Word and Excell when you highlight text and drag it to the desktop for pasting into other documents.  If this isn’t something you ever do, or you have Word and Excell 2000 or later, which allow you to have 12 items on the Clipboard, click the Start button | Control Panel | Folder Options | File Types tab.  Under Registered file types, scroll down and highlight the SHS extension.  Click Delete | Yes | Apply | OK.

Solution 7: Dealing with double extensions

When you turn on your extensions in Windows, you’ll be able to detect viruses that piggy-back themselves onto innocent looking files with a double extension, such as happybirthday.doc.exe.  NEVER trust a file with a double extension – it goes against Nature.

Solution 8: Beware of unknown .exe files

A virus is a program that must be executed to do its dirty work, so it may have an .exe extension.  Unfortunately, this is the same extension used by legitimate program files.  So, don’t panic if you find files named Word.exe or Excel.exe on your system – they’re your Microsoft software.  Just don’t EVER open any file with an .exe extension if you don’t know what the file’s purpose is.

Solution 9:  Watch out for icons

Viruses in attachment files have been known to assume the shape of familiar looking icons of text or picture files, like the wolf in the hen house.  If you recieve an unexpected attachment, don’t open it without first running it through your anti-virus software.

Solution 10:  Don’t download from public newgroups

What better place for a hacker to lurk and stick his virus than in the middle of a crowd?  Sooner or later, someone’s bound to download it and get the virus going.  Don’t download files and programs from newsgroups or bulletin boards, or open attachments sent from strangers in chatrooms (“Let’s exchange pictures!”) without first scanning with your anti-virus software.

Solution 11:  Avoid bootleg software

This may seem like a no brainer, but sometimes that tiny price tag on a popular but expensive package can be too good to resist.  Resist it!  Likewise, be careful about accepting application software from others.  You don’t know where it’s been, and what may have started out as a perfectly clean package could have become infected during installation on someone else’s infected computer.

Solution 12: Protect macros in MS Word, Excel, and Powerpoint

A common type of virus uses macros.  Macros are sets of stored commands that users can save as shortcuts to perform long functions in just a few keystrokes.  A macro virus may perform such mischief as changing file types from text files or spreadsheets into templates, locking up keyboards, and deleting files.  Word, Excel, and PowerPoint come with macro virus protection.  To make sure yours is activated, open each application, then click Tools menu | Macro | Security.  On the Security Level tab, make sure Medium or High is selected.  Clcik OK.  If you are already infected with a macro virus, you may find that the steps of this procedure are unavailable becasue the virus has disabled them.  In that event, run a virus scan on your system to see if your anti-virus software can kill the virus.

Solution 13: Use passwords

If you share your computer, it’s a good idea to assign everyone a password.  Passwords should be a combination of letters and numbers no less than eight characters long, and preferably nonsensical.  Never write passwords and stick them anywhere near the computer.  To assign passwords in Windows XP, click the Start button | Control Panel | User Accounts.  Follow the prompts to assign/change passwords.

Solution 14: Update application software

Microsoft constantly issues patches for the security holes in its operating system and applications software.  however, don’t be lulled into complacency if you have Windows Update automatically checking things for you.  Update checks for patches to repair bugs in the operating system, not for security problems.

To get the latest security hotfixes (as Microsoft calls them), visit www.microsoft.com and look for hotfixes for all your Microsoft software, particularly Outlook and Outlook Express.

Microsoft also has a free downloadable package called Microsoft Baseline Security Analyzer (MBSA) that scans your system for missing hotfixes.  It works with Windows 2000 and XP Home and Professional only.  It doesn’t support Windows 95, 98, or ME.

To download the MBSA, go to the TechNet section of the Microsoft Website.  Be warned that the information is written in techie language, so you may find it daunting.

Last Words:

Now that you know some ways for avoiding and dealing with viruses, let’s wrap things up with some solution you’ve probably heard before but have ignored.
  • Back up your files regularly – If a virus crashes your sytem, you’ll feel much better if you’ve got backup copies of all your important files.  Make the backup copies on a media that’s separate from the computer, such as on diskettes, CDs, or zip disks.  Scan them for viruses before you put them away to make sure they aren’t infected.  If they are, they’ll do you no good if you ever have to use them because they will just transmit the virus right back onto your computer.
  • Make a boot disk – Create an emergency boot diskette before you have a problem so you can start your computer after a serious security problem  To make a boot diskette with Windows XP, put a blank floppy disk in the drive.  Open My Computer, then right click the floppy drive.  Click Format.  Under Format options, click Create an MS-DOS startup disk.  Click Start.  Keep the disk in a safe place.  With luck, you’ll never need to use it.
  • Turn off you computer – DSL and cable connections that are “always on” may be convenient, but you should always turn off your computer when its not in use.  Hackers can’t get to a machine that’s powered off.

Computer Tips : How To Protect Your Computer From Viruses

Resource : http://www.redneck-puters.com/protect-your-computer-from-viruses/

How To Monitoring Your Computer Activity?

PC PANDORA Monitoring computer activity


Why you must Monitoring Your Computer Activity? The reason is to protect your kids (or anyone else) from the dangers of the Internet. So how to monitoring your computer activity? You can install PC PANDORA software on your computer or laptop to protect and monitoring the user from dangerous sites..

Do you know about PC PANDORA? PC Pandora is great Software where you can get the kind of protection needed for your computer. PC PANDORA is more like a spy. It means that it can give you the real record of the activities of your computer. If your kids go online (or anyone else) you still can watch their activities in your PC, so that you can avoid them the prohibited or dangerous site. PC PANDORA does not mean to trespass the privacy. On the contrary, it can help you monitoring your computer to avoid it used for illegal usage, and PC pandora also can help you monitoring your children. It gives us the abilities to block bad site from younger children so that you can allow them to get online without worry. As a parent, you worry about what your child is doing online. If they are accessing chat rooms or other sites, you can watch what they are saying and doing. Catch predators in the act before your child can run into a problem.

 Download this site and install it yourself. The program is simple to download and install. With parental controls, PC Pandora gives you the ability to block access to inappropriate web sites. It blocks access to some websites that you set up to block. If the kids try to access a site they should not access, the computer sends a message that says access denied. It will keep them from even logging in to the site. If they try to launch programs you have set up to keep them from, it gives a message of error. The best part of PC PANDORA can snap a photo of the user every so often if the PC has a webcam.

PC Pandora software is set up secretly. Nobody knows that you are monitoring things but you. It works on Laptops, desktops, tablets, phones and cameras. It works on most electronic equipment that access internet. It is available to install on printers and scanners. The website will block by using firewalls, or network communication blocks. If you have Norton, spyware doctor, AVG. antivirus or other website virus controls, you can configure it to exclude these from detection. Updates downloaded as available.

PC PANDORA is really helpfull. Works exactly as advertised. You may have know that using PC PANDORA will give you plenty of benefits. the benefits include :
  • The ability to see the screen content
  • The ability to see the log in information and passwords
  • Knowing the keystrokes
  • The report of website visited
  • Knowing the running programs
  • The report of e-email in chat messengers and the users
  • The report of active and inactive periods
  • The report of webcam of output
  • Knowing the files that has been read, erased, and moved
  • The report of web requests, search queries, printed documents and bandwidth usage.
PC Pandora is a fantastic addition to a home computer. If you need to protect your computer or watch out for your children with parental locks, download Pandora today.

                                         CLICK HERE to Visit PC Pandora Official Site


How to Increase the page load speed of mozilla firefox

Increase speed up mozilla firefox

How to increase the page load speed of mozilla firefox to make faster your internet browsing? Mozilla Firefox is the best internet browser available (in my opinion). The best thing about Firefox is the way it lets you do whatever you like with it.

If your Firefox is slow or misbehaving, there is a handy trick to help you vastly increase the loading speed of Mozilla Firefox. You can make Firefox perform up to 40% faster and improve the page load speed With a little minor "tweaking". With just a few clicks and some typing, you can experience faster browsing and surfing Firefox. Just follow these steps to adjust your settings. Do not fear if you have never touched your configuration file before, just follow these simple steps and you’ll have it done in no time.

Step 1 : Open the Firefox, type "about:config" in the address bar and press Enter

Step 2 : Find and Set “network.http.pipelining” to “true”

Step 3 : Find and Set “network.http.proxy.pipelining” to “true”

Step 4 : Find and Set “network.http.pipelining.maxrequests” to some number like “10”. (Meaning that it will make 10 requests at once.)

Step 5 : Right click anywhere in the configuration window and from the pop-up menu select: “New” > “Integer” Name it “nglayout.initialpaint.delay” Set its value to “0” (Zero)

Step 6 : Restart firefox


These simple tweaks will make your web browsing with Mozilla Firefox 2-3 times faster and easier. And I think they are fairly easy to apply.

Internet Tips : How To Increase The Page Load Speed Of Mozilla Firefox

Registry Easy : Best Registry Cleaners and Repair PC Errors

free Registry Easy to clean, fix and scan PC errors

How to scan, clean, Fix and repair PC Errors with Ease? Do you stand a computer that just isn’t moving? Nobody can! It is so frustrating to wait and wait for your home computer or laptop to start up or run some needed stuff. We live in a fast moving world and we need fast moving computers. The fact is that the new computers are fast, but there are so many viruses, malware etc. on the internet that our computers get slow very quickly. You can Speed up your computer with Registry easy software.

Registry Easy can Restore, Fix & Clean Up Your Registry Files and Errors in Windows. Does your PC crash, is your system running slow or are you receiving regular error messages? Registry Easy will scan your system registry and hard drive for invalid file and system references for free. These invalid references cause system instability, PC errors, constant crashes, and general system slowdowns. Registry Easy is a well equipped solution for all your registry problems to make sure that your computer is safe, secure and fast.

Registry Easy is really easy to use. The first time when I scanned, it took me less than 2 minutes to scan the system. It immediately created the back up of registry and found more than 1700 errors and fixed all of them. I was quite surprised as I had never seen such a large number of errors in my system with other registry cleaners. The first thing which I noticed after scanning and fixing with this software was that when I checked my windows task manager with ctrl, alt and delete, I could see the CPU Usage was much lower than it was before. That's when I realized that this software had really worked because I couldn't see those differences in the previous registry cleaner's that I had used.

Registry Easy uses a high-performance detection algorithm that will quickly identify missing and invalid references in your Windows registry. With a few easy steps Registry Easy will scan your entire Windows registry for any invalid or obsolete entries and provide a list of the registry errors found. After that you can choose to clean list items with selection or automatically repair them all. Here are some of the top unique features of Registry Easy which makes me love this software:
  • Creates backup before performing the scan.
  • Can fix most of the corrupted dll files of your system.
  • Can fix all the registry errors it locates.
  • Has a startup manager with option to disable and remove programs.
  • Can fix your browser to the default state.
  • Can remove unused browser plugins to experience faster browser experience.
  • Can optimize your system
  • Can optimize your Internet
  • Can tweak your memory to make your system run more faster.
Registry Easy was able to uncover a whole range of problems with the registry, and surprisingly with a few problematic or overlapping fonts as well. The results were noticeable after the repair operation as the PC seemed to be "quicker" in general - and the common error messages that were normally popping up on startup disappeared altogether.

It was just amazing that I found Registry Easy. To tell you the truth, when I first tried the software, I knew that this was it. I downloaded the free trial, opened the program and run Registry Easy for the first time. It was/is very fast, found a bunch of errors and fixed them all. I have had no speed problems since I used Registry Easy. I truly recommend Registry Easy for everybody. If you don't believe, go and download the FREE TRIAL now and test this beast yourself. Go ahead and grab a Registry Cleaner before you get frustrated with your computer. Click the link below to view their site.

                     Download Registry Easy Now For 100% Free Scan!


How To Speed Up And Make Faster Computer Slow

Speed up Computer Slow


How To Speed Up And Make Faster Computer Slow?  Getting ways to speed up your computer is the most important thing you could do as a computer user. This may keep your computer from being thrown out the window, or even smashed up with a hammer. This is how far people get pushed when computers don’t do what they want them to do. It is one of those annoying little things that you have to do all the time, maintenance jobs, just to speed up your computer. When you've  a slow computer and you are trying to work on it, you can easily get frustrated to the point of doing something drastic.

If you want to improve the speed of your computer, that’s great. However, there are things you can do to speed up your computer. Stop wondering why is my computer so slow. The following is a list of ways you can improve your computer's performance.

Steps to Speed Up and make faster Your Computer’s Performance

1. Make Sure Your Hardware is Sufficient

You must make sure if your computer have the proper hardware to support Windows is critical.

2. Identify and remove malware

You must make sure your computer there isn't any hiden malware infects currently infecting your system. Even if you think there isn't, chances are some type of malware is hidden somewhere in your system. If you don't already have security software installed such as antivirus or internet security, your computer is most likely infected. Malware includes all malicious computer threats such as viruses, spyware, and adware.

Malware can really slow down your computer and you can't identify malware on your computer without the help of a decent security program. To identify and remove malware you'll need to run a full system scan using your security program. Once you've removed all hidden malware on your computer, you should also consider setting up an automatic weekly virus scan to run so you won't have to remember to do so yourself.

3. Uninstall Unused Programs

Are you one of those people that constantly download programs and install them onto your computer? Every software program you have on your computer is taking up space. It is not only taking up space, but it might also be checking for updates and connecting to the Internet. It also might be starting up when your computer starts up. There are so many good reasons why you should Uninstall Unused Programs. Uninstalling any programs and services that you find unused will really help to clear out the clutter and free up some extra memory on your hard drive.

4. Defragment your computer Hard Drive

The more information and programs you have on your computer, the more it is likely that Windows has placed parts of the same file in different locations on your hard drive. It may do this for hundreds of files and programs, depending on how much space is available. Defragmenting the hard drive places all information for each file in one place. The result can be a faster computer experience. You can find this utility from Start >> All Program >> Accessories >> System tool>> Disk Defragmenter or you can follow procedure from step two where you can get ‘Disk Defragmenter under ‘Tool’ Tab.

5. Update device drivers regularly

Every program on your computer must be updated regularly. If you don't do this, you will find that you will get problems. Even Windows itself needs updating, along with any other applications and games, and even hidden device driver software. To see if your device drivers are performing properly you can go to the Control Panel, click on system, advanced settings, and then you will find device manager under the hardware tab. The quickest way to locate and install the newest drivers for your computer is with a simple Google search including your exact computer model name such as, drivers for HP TouchSmart 1050. You'll usually be able to download a complete driver package including all up to date drivers for your computer model on your computer manufacturers website.


6. Scan Your Windows System for Errors

An operating system is a collection of files that perform different functions. It is possible, over time, that one or more of these system files has changed or become corrupted. If this happens, the speed of your system may decrease. By using a utility called “System File Checking”, it will inspect these files and correct any problem it finds.

7. Reinstall The Operating System (OS)

You probably aren't aware of all the unnecessary clutter that can accumulate over time and really slow down your computer. Sometimes the easiest and most effective solution to regain your computers top performance is to simply upgrade or reinstall the entire operating system. Upgrading to the latest OS edition will certainly provide the most effective speed boost, but reinstalling your current operating system will work just as well to give your computer a fresh start. Ideally, you should first back up only your most important files and documents to a separate secure location such as a flash drive or external hard drive, that way you can safely install the operating system and restore your files after.

8. Add more RAM (random access memory)

RAM (random access memory) is basically like a turbo kit for your computer and is a physical hardware component that is easily upgradable. If you wonder why is my computer so slow whenever you have lots of open windows and/or programs open, adding more RAM to your computer can certainly allow you to run more powerful programs at once. Although working with a hardware component yourself may sound a little out of your comfort level, the RAM is one of the easiest hardware devices to replace. Since no data is ever permanently stored on the RAM, you can easily swap out and upgrade RAM in your system without worries of losing or damaging data. The more RAM your computer has, the more high memory programs you can run at once and the more powerful your system will become. 64-bit operating systems can support a whole lot more RAM compared to 32-bit systems which typically have a max RAM limit of 4 GB.

9. Don’t Automatically Start Programs

Programs use operating memory (RAM, also called system resources). Unless you always use these programs, you can keep them from loading at Windows startup and speed both the booting of your computer and its performance.

10. Disk Cleanup

As you all have experience about shortage of memory in your MICRO SD Card, which slow down the mobile function performance. Same thing happen with computer’s primary and secondary memory. So, you must clean your disk to remove unwanted files and folders. Window system provides an utility called ‘Disk Clean UP’, which helps us to remove any error reports, temporary internet files etc. You can find this utility from Start >> All Program >> Accessories >> System tool>> Disk CleanUp or you can follow procedure from step two where you can directly click on ‘Disk CleanUp’ button.

11. Disable Unnecessary StartUp items

When we start our system, systems starts many processes which we don’t require at starting our system and this also slow down our system performance at startup as well as while they are running in background. So, we must stop this unnecessary process that slow down our system performance, which will boost your system speed with almost 20%. You can disable this process from Start >> Run >> (type) ‘msconfig’ follow by enter. Now switch to ‘Start up’ tab and uncheck the unwanted process and then hit OK.

12. Clear out your browser's

Sometimes just doing some basic housekeeping can have a positive, if small, effect on PC performance. It is easy to manually clear out your browser's cache and delete temporary files, but using a free application like CCleaner (Windows) or OnyX (Mac OS X) automates the entire process and finds files (and registry entries in Windows) that you might otherwise miss. 

13. Disable Indexing

One of windows properties is indexing files and folder, which help us to search the files and folders faster. But since window uses CPU and memory for indexing it takes lots of memory space and hence you system get slow. So, you can disable this properties which will just slow down searching speed which is not required in personal computer since one knows about his/her data location. To disable this property just right click on the respective drive (any drive) and got to properties, where you need to uncheck the option i.e. ‘Allow files on this drive to have content indexed in addition to file operation'.

14. Clean Temporary Files

This is one of the window inbuilt application, which is used to store ‘Temporary files in respective folders’. Using this application you can see all the temporary files and folder which you need to delete time by time. You can check this application by typing ‘%temp%’ in the Run window. As soon as temporary folder appears just delete all the files and folders. But sometime it is not possible to delete some of the files because it may be open currently. So don’t worry if it doesn’t get deleted.

Computer Tips : How To Speed Up And Make Faster Computer Slow

IPAD Video Lesson Updated For iOS6

IPAD Video Lesson Updated For iOS6


iPad Video Lesson Updated For iOS6. iPad is created not only to make your life and work easier. It is the tablet to play, to amuse, and to entertain you. None of other devices can do what iPad can do for you. If you have a new iPad, you must need iPad Video Lesson because there was no instruction manual in there. I thought it was a mistake and the Apple factory forgot to pack the instruction book. Do you need iPad Video Lessons? if you want to get the most out of your new iPad, then the answer is absolutely yes. It’s true that Apple does not even include a instruction manual with the iPad. It isn’t that they forgot, they just market the iPad as not needing one.

This is where we will try to see how Ipad owners can benefit from these tutorial videos. Through these videos you will be able to get the most out of your ipad then start watching these. If you are one of those who think that there are still a lot of things to discover with your Ipad then this surely is for you. So read on and learn more.

iPad Video Lesson


iPad Video Lesson, a product by iPad Pete is there to help you to get the best out of your iPad, it will help you to get every details of what your iPad can do and what you can do with your iPad. iPad Pete will teach you everything you need to become a master iPad user. When you’re done, you’ll know everything the iPad is capable of. And since everything is shown to you on video, it’s easy to understand. Each lesson is given in 11 minutes, with easy to follow instructions that can be viewed again and again, just in case you didn’t get it the first time through.. All the information is give in the form of videos instead of e-book as it is always easy to watch and follow something than just reading it and trying to implement it. E-book also takes a lot more of your time to do same thing that you can do by following a video.

The video lessons will teach you how to be more productive with your iPad. You will not only practice the basic computer skills, but also get some fun with it. All instructions are easy to understand followed with clear and detail information. What you need to do is just watching the videos, and practice.

One of the best things about iPad Video Lessons are that you just need to pay only once for it and you will get life time access to all its videos, tricks and tips and many more future updates. It covers all the latest applications and software updates regarding iPad. It also provides you 24×7 customer support. You get 100 different video lessons, each teaching you how to get the most out of your iPad. You’ll learn all the popular apps, and all the basics, and even the more advanced stuff that only the experts know. You’ll have access to these lessons anytime, day or night. And all the lessons are updated if there are any changes made later, so you won’t ever learn anything that isn’t 100% up to date.

And the best part is, you get a 100% guarantee that you will love these lessons. But, after a full 60 days, you aren’t happy with the lessons offered, if iPad Pete doesn’t have you using your iPad like a true pro, you can ask iPad Pete for your money back, without any hard feelings.

To get started with these new Updated Ipad Video Lessons visit Official Ipad Video Lessons Website.

                                              CLICK HERE & GET DISCOUNT NOW


The Easy Ways To Acces Blocked Websites

Ways To Access Blocked Website


The Easy Ways To Access Blocked Websites. Most of us find ourselves in situations where a website we wish to visit is blocked by a software or by our ISP (Internet Service Provider). So the question arises, how can we access blocked websites? However, there is a way around this. Here is some techniques are really simply how to access blocked websites.

1. Using IP Instead of URL 

This depends on the software/application used. Sometimes blocked sites are stored as a list of URLs (eg. www.yahoo.com, www.donwload.com,etc) and typing the IP instead of the URL might sometimes work. In a local computer, doing a ping domain.com command in Command Prompt (Mac users use Terminal) will return you the IP address. You can also do it online via www.whatsmyip.org

2. Redirection with Short URL service

Sometimes the URL you intend to browse might be ban, but converting them to another a shorter URL with short URL services might just help you to bypass the settings.

3. Google Cache

Search engines like Google and Yahoo cache webpages and these cached pages are stored in search engines themselves, which likely will be added to the blocked list. Click on the ‘cache’ will bring you to a cache version of the page, as updated as how Google caches it.

4. Internet Archive – Wayback Machine

Wayback Machine is a internet service that periodically keeps a copy of almost all websites in the Internet way from the date they’re started. Clicking on the latest copy of what Wayback Machine have should be somewhat similar to the real site.

5. Using browsing proxies

Browsing proxies are services that allow you to use their Internet connection, thus bypassing most of the restrictions setup by the ISPs or the network administrators. There are plenty of these on the Internet that can be accessed through your browser. All you need to do is access them and enter the URL of the site that you want to access in the address bar provided by the site. All the requests will then be channeled through that browsing proxy server.  Here are 4 popular free proxy websites you can use:-

  • http://www.hidemyass.com
  • http://www.anonymizer.com
  • http://www.spysurfing.com/
  • http://proxify.us/

6. Use Proxy in Browsers 

If you wish to visit your blocked website using an interactive proxy website, you do not need any setup. But, if you wish to use proxy websites that can only be accessed using their IP address and port number, you must configure your browser to use them. Follow the instructions given below to setup this type of proxy websites in your browser:-

Google Chrome and Internet Explorer Users
Google Chrome uses the same network settings as Internet Explorer. So, in order to configure Google Chrome to use a proxy server, you have to configure Internet Explorer. You can configure a proxy server in Internet Explorer by following the instructions given below:-
  • Start Internet Explorer.
  • Click on Tools, Internet Options.
  • Click on Connections Tab, select your Network Connection and click on Settings.
  • Check on Use a Proxy Server for this Connection 
  • In the Address field, add the IP Address of your Proxy server. In the Port field, enter the Port Number.
  • Click on OK and OK again.
Mozilla Firefox Users
Mozilla Firefox users can configure their browser to use a proxy by following the instructions given below:-
  • Start Mozilla Firefox.
  • Click on Tools, Options.
  • Click on Advanced Tab.
  • Click on Network tab.
  • Click on Settings.
  • Encircle Manual Proxy Configuration.
  • Enter the IP Address and Port Number at the appropriate place. In most cases, it will be a HTTP server.  
After you have successfully configured your browser to use the proxy server, you will be able to access blocked websites whenever you browse the internet with your browser.

7. Retrieve web pages via Email

Web2Mail (http://www.web2mail.com/lite/welcome.php) is a free service that sends websites you want to read right into your inbox. All you need to do is send an email to www@web2mail.com with the URL as subject title

8. Bypass with Translations services

Use Google translate. Open Google translate ,type the URL and translate page from one language to another and display the translated results on their own page.

Internet Tips and Tricks : The Easy Ways To Acces Blocked Websites